some things to do with iPhone photos

At any given time I have hundreds of photos on my phone. It seems a shame to just leave them there, but it always seems like so much work to do anything else. Well, actually, it’s not really. There are several really easy ways to transform those memories and little works of art from electronic media to real life photos, which are much more fun to look at and share, and there are tons of fun ways to display your photos once you get them in your hot little hands.

Postal Pix

First up is PostalPix, a free iPhone app (and coming soon for Android!) that makes ordering photo prints right from your phone really easy and inexpensive. The service is also really fast, shipping is reasonable, and you can even use PayPal to pay for your prints. The last order I placed got to me in just a few days. They offer a nice variety of sizes, including square prints (4×4, 5×5, and 8×8!), which means they can print Instagram and Hipstamatic photos, no problem. They also print standard sizes up to 8×10. I’ve ordered from them a couple times now, and I’ve been very pleased with the quality. The paper is nice and sturdy, with a matte finish. I’ve even downloaded some of my Nikon photos to my phone from my flickr account, and had those printed and they came out absolutely crisp and clear, and were nice enough to frame!

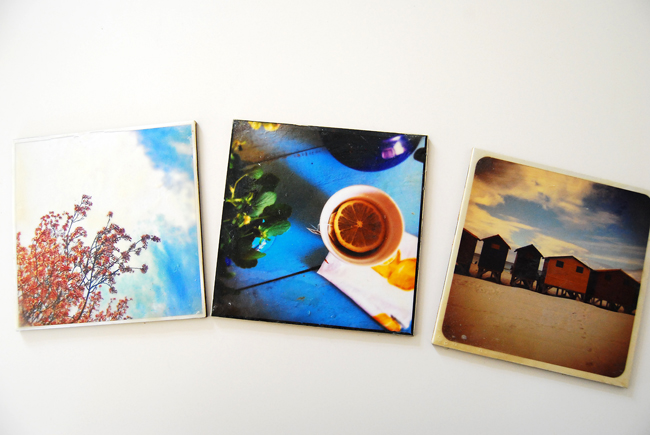
Here’s what I did with some of my Instagram prints from Postal Pix:

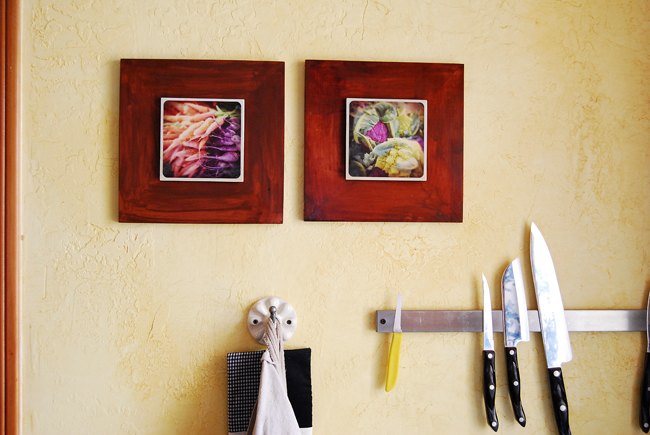
Postal Pix encaustics

I’ve heard of encaustic painting before, but reading this post inspired me to give it a try with some of my photos. I ordered some 5″ x 5″ boards from Dick Blick, and I had some beeswax, so that’s what i used. I definitely need to practice my technique, I messed up a couple prints because I think my iron was too hot and I probably held it in place for too long. Still, I had plenty of successes too. I like the warmth and texture that the beeswax added.

more encaustics

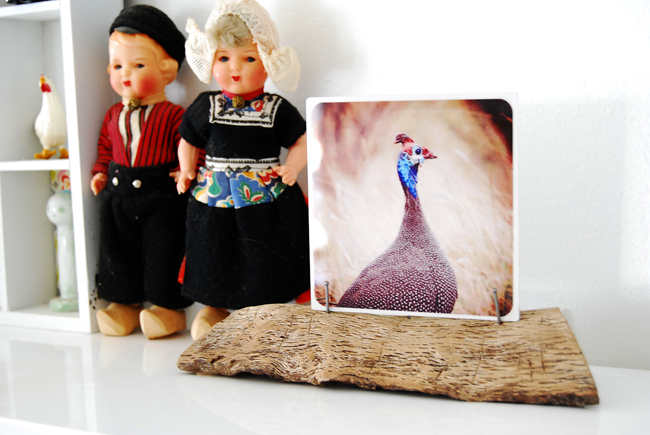
PostalPix also offers aluminum prints, which are so nice. They are a bit pricier, but I ordered this 4×4 print of a photo I took while in Africa, and I love the way it looks. It’s nice and sturdy and seems to be scratch-resistant. The finish is smooth and slightly glossy. I like that it’s something different, and doesn’t need framing. I made a quick little stand for it with a chunk of wood from the yard. I sanded it a bit and then just pounded in a few nails-two in front and one in back. I have a scrap wood/stick thing going on, as you’ll see throughout this post.

aluminum print

Another free iPhone (and Android) app is Postagram. With Postagram you can order postcards, and have them sent anywhere in the world. What’s nice about Postagram is that you can choose not only photos from your camera roll, but also photos directly from Instagram and Facebook.

Postagram postcards are also nice, heavy cardstock, with a glossy finish. You are limited to only square photos (which you scale and crop as you place your order, if they are not already square), but the photo itself can actually be popped out of the postcard for display. You also have the ability to add a personalized message and your own little avatar. For just 99 cents, it’s a nice way to send a greeting to a friend, with the bonus of a nice photo they can save and display.
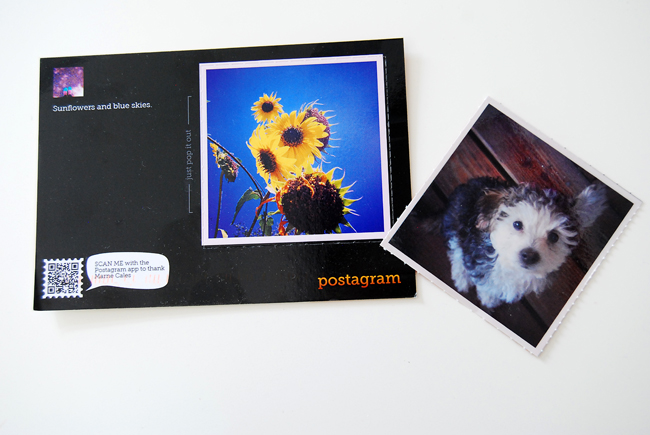
Postagram is powered by Sincerely, which is also behind the lovely Cartolina Postale app I talked about earlier this year, and several other printing apps that look fun, like Popbooth. You can also buy credits and add contacts to your address book online, to make checking out from your phone even quicker and easier.

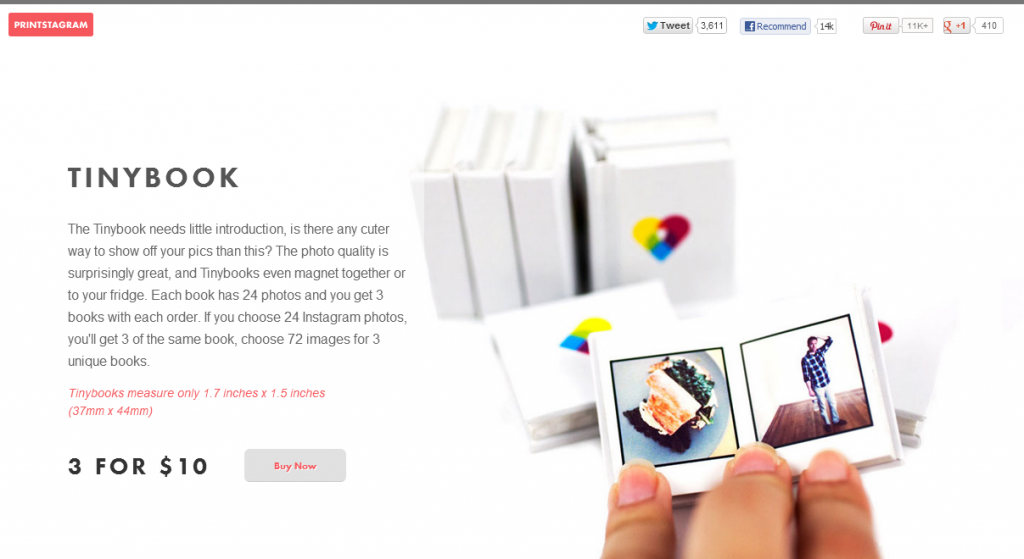
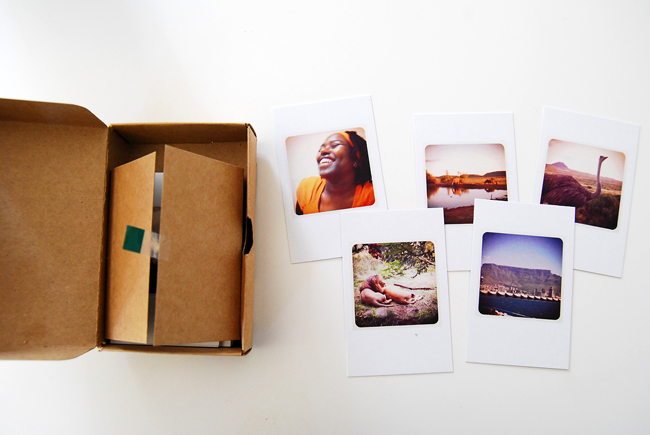
Printstagram lacks the convenience a standalone app, but it makes up for it with the variety of products. To order from Printstagram, you’ll need to go to their website and connect to your Instagram account. Then you can choose from a variety of products, from square prints-in two sizes, to stickers, mini books, posters and more. I ordered a set of the mini prints, and chose all my Africa Instagram pictures, plus a few others. They are business card-sized, and extra thick and sturdy. They came nicely packaged in a little brown box, but at the time they took quite a long while to get here, it was a good three weeks or so, and I’m not sure that they are shipping faster yet. While the company is based in California, their products are actually printed and shipped from Hong Kong. You also don’t have the option to order just a print or two, you have to order in the quantities they specify. Still, the quality is good and their products are unique, so if you’re not in a big rush, they are worth the wait.

Printstagram tiny cards

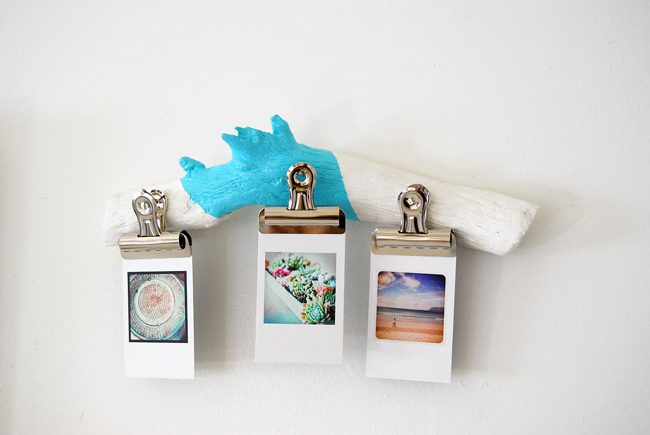
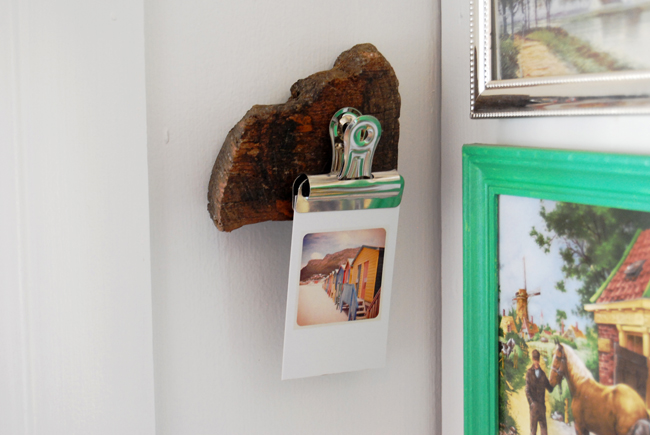
I’m using most of my little prints in a scrapbook, but I wanted to display a few around the house as well. I found some more bits of wood and a few bulldog clips. I had some fun with paint and finishing wax, and used someCommand Picture Hanging Strips for hanging (I only recently discovered these handy little things, I love them!).

display stick

wood block photo holder

Do you need a little more iphoneography inspiration? I thought this was nice:

iPhone shooting techniques


Whew! That was a long post with a lot of photos. I hope it was helpful! Has anyone else been printing photos from their phone? Do you have a creative display idea to share?

Read More

tiny and cute

I have important things to do, but I took a little time here and there over the past few days to make a tiny pink bunny. Because sometimes you just need to do something pointless like that. 

image from www.flickr.com

I can't take much credit for the cuteness, I used a pattern and kit from The Old Pincushion, purchased over a year ago. She has lots of very cute patterns (and the supplies) for various little creatures, I can wholeheartedly recommend her shop.

And now I'm patting myself on the back for actually finishing a project, even though it is quite tiny. 

image from www.flickr.com

Most of the sewing was done by hand. I am not particularly talented with this, or with making small things. It's not something I will probably do very often, but the challenge of it is fun once in a while. 

image from www.flickr.com

I'm quite tempted by the tiny elephant pattern. Perhaps I should order it now, so I can make it next year.

image from www.flickr.com

Do you like hand sewing and making tiny things? 

Read More

books books books!

I have a book to give away here on the blog this week, and you can give away 20 books if you hurry! I'll tell you about mine last, because it's not as important or exciting as World Book Night! Have you heard about this? I should have mentioned it sooner, but I signed up at what I thought was the last minute and then didn't think about it again until I got an email the other day that I had been accepted and would get the opportunity to share twenty copies of a favorite book. 

Books

So, what is this World Book Night thing, you may be asking? It started last year in the UK and has expanded to include the US and Ireland this year! It's a charity for the promotion of literacy and reading, which is very dear to my heart. Anyone in these three countries can apply to recieve twenty copies of a favorite book (you choose from a list of 30 very good books-I had to really think about which I wanted to share) to be given away in a location of your choosing-preferably to non-readers, on April 23. I chose Peace Like a River, which is that rare kind of book that stays with you for years and years. Narrated by a young boy whose voice has been compared to Scout Finch or  Huck Finn, it is the story of a family and a tragedy and miracles and goodness. I can't wait to share it!

Go apply right now, the deadline is Monday, February 6th at midnight EST. You don't have to write long essays for each question, just give succinct but thoughtful answers and I think you'll have a good chance at being accepted. At least that's what I did. 

Now for a little blog giveaway. It's been awhile since I've done one, but I just received a copy of the new paperback edition of Creative Quilting with Beads, which I contributed to a few years ago.

image from www.flickr.com

It's got lots of fun projects, and even if you don't want to replicate them exactly, it's good for inspiration for everything from bags to wall hangings to fridge magnets (I think theses are super cute and would make great little brooches). I recently cleaned out my bead stash, so I might even include an assortment of seed beads and a little sewing kit along with the book.   

Quilting

To enter, just leave a comment and tell us about a favorite quilting project or beading project (links to pictures are encouraged!) you've done or dream of doing. I'll leave the comments open until next weekend. 

Read More

pincushions for sale and a pattern for free

I did it, I wrote up a knitting pattern and made it all pretty, and you can download it here, or on Ravelry, and there will also be a link in the side bar. I called them Bridge the Gap arm warmers for obvious reasons, not to mention, they will keep that gap between elbow and wrist cozy too. 


image from www.flickr.com


Please do let me know if you happen to knit yourself a pair and if you find any errors or anything unclear in the instruction. I am studying up on pattern writing, which is like learning a new language. I can read it, obviously, but it's a little different to write it. I'm nervous and excited, and ready to move on to the next design, which I hope will be even better. 

Meanwhile, other sorts of making is also happening as I tidy up my little house studio. This is kind of fun, cleaning up all my stuff and making things with what I have. I finished up a bunch of pincushions and a few needle books and listed them on Etsy.  

All pincushions

 These were made with some vintage copper candy molds I found at an antique mall. I really like them, and I might have to keep the pink one for myself if it doesn't sell. The others, sold in sets with matching needle books, are tiny tart tins. I do love a good needle book. 

All sets 2

I sorted through all my vintage buttons to find just the right ones. I've done these before and they sold out pretty quick. I'm working on a new, bigger pincushion. I'll try and get some of those listed next week. 

Read More

a simple craft

First of all, thanks for all the kind words when I asked about what makes a good blog. My plan right now is to keep doing what I've been doing, but I will be doing it much more often! My goal is to have a new post every week day, and I'm having so much fun coming up with ideas to share. So thanks for visiting regularly, and I hope I will be able to make it worth your while!

As I mentioned before, I'm doing some serious cleaning out around here. This week I'm working on our laundry room which is just a tiny junk room, really. Now it's a little easier to walk in there without tripping over the vacuum or a pile of laundry, and I will eventually do some painting and reorganizing. While going through a cupboard the other day I came across a couple things that inspired a little craft project. I have a stack of little shopping bags, the brown paper bag kind, with the twine handle that I can never bear to throw out because they're so cute, you know? I sometimes used them for lunch bags, but since I'm not taking my lunch anywhere I thought I'd find another use for them. Of course the first thought was gift bags, but how to decorate them? Most have a big logo for the stores they came from, so that's kind of tacky. Then I found some coffee filters. Not being a coffee maker, I'm not sure where they came from, but I suspect I was saving them for some long forgotten craft project. 

image from www.flickr.com

So the wheels in my brain started spinning, and I thought about some other stuff I had laying around, and without buying a thing I came up with a plan. Some old book pages taped over the logos was easy enough. Then I experimented with coloring the coffee filters. I pulled out some watercolors for the pink flower, and the tea-dyed the filters for the antique-y flower. I'm not very skilled with watercolor paint, but I don't think it's possible to mess it up in this case. The filters can handle a lot of water, so I just soaked them and dabbed paint all over and blotted them with a paper towel when I was done. The tea-dyed filters were literally just soaked in pot of tea. I squeezed them out and laid them flat to dry, which only took a half hour or so. They ended up with a nice crinkly texture.

Each flower is six or seven layers, and I simply folded each filter in half and then in half again a total of four times. Each layer was then trimmed into a petal shape, each layer successively smaller than the last. The smallest layers I slashed the petals apart for a fringe-y effect. 

image from www.flickr.com
I stacked up all the layers and then searched through my box of beads for just the right centers for my flowers. I sewed on some pearly beads in different sizes and colors for the tea-dyed flower, going through all the layers, and did the same with some irredescent green seed beads for the pink flower. 

image from www.flickr.com
I cut a circle of felt for the back of each flower and cut two small slits for the pin back to go through. I covered the stitching on the back with hot glue and then also applied a line of hot glue around the edge of the felt circle before applying it to the back of the flower.

image from www.flickr.com
Lastly, it was just a matter of flipping the flowers over and fluffing up the front. I went layer by layer and even used a little steam from my iron to make them stand up a little more. 

image from www.flickr.com

Oh, and as an added touch, I used some eyelets on the bags for the pins to go through. They probably aren't necessary, but they're fun to use, so I went for it. 

image from www.flickr.com
I'm sure what I came up with is not entirely original, I know there was a Martha Stewart coffee filter rose project not long ago, but I like to think I put my own twist on it. And the flower is a nice bonus on top of whatever gift I might put in the bag. They are surprisingly durable and could be pinned on a lapel or a bag or maybe a hat. Next up, I think I'm going to play around with some fabric flowers. I love flowers!

Read More